Saturday, July 29, 2017

Free Printer Ink? Sign me up!

Hi, I'm Heather, and I'm a teacher. Oh, you knew that? I bet you didn't know that I'm also poor. Oh, you did? You're a teacher too? You feel my pain? Good, stay with me.

This is the time of year where I end up spending all of my money. Which is sad because teachers in my old district (I'm switching districts this summer) get paid 10 times a year. So the last time I got paid was June. JUNE!

Now I'm trying to get my classroom things all ready. I also recently started putting resources on Teachers Pay Teachers, which I want to print out. Cue my cranky printer.

Literally the angry red light has been flashing for 3 days. I apparently have a paper jam. Why not just clear it? Well, my friends, there's no paper in the printer! Yep, none. I even took it out of the load tray. I then Googled ways to fix 'phantom paper jams'. This is not my phrase, friends. It's Google's phrase. Apparently this happens often.

I found about 10 different ways to fix it, none of which I felt like doing. Plus, I had recently heard about the wonders and glories of Instant Ink via Instagram and I was pining for an Instant Ink printer. I absolutely could not afford a brand new printer, even on sale as they have been, so I scoured Facebook Classifieds, LetGo, and Craigslist until I found an HP Envy 5530 All-in-One. I double checked the list of compatible printers and found the 5530 on there. Snagged it for $30.

Then I scoured the internet to find out the cheapest way to do Instant Ink. I found some tutorials that were vague, and some that were incorrect. So I did some trial and error and was able to get 300 pages a month FREE for 9 months.

Here's how:
  1. Go to Staples or Best Buy and purchase an Instant Ink card. You're getting the card to get 1 month free. if you sign up online, you don't get that month free. I got the $4.99 card, but I think you can get the $2.99 card and have it work out for you. Keep reading.
  2. Go to the HP Instant Ink enrollment page and click 'Sign Up Now'.
  3. Click the 'Enter Key' link where it says 'Have an enrollment card?'. Scratch the silver off the back of the card and enter that key. Viola, 1 month free.
  4. On the page where you can enter promo codes enter '6freeink' and hit apply. Then enter 'hSNFQ' to get another month free. There's 7 more months for you.
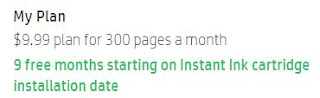
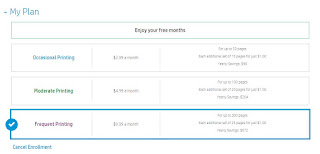
  5. When you get completely signed up and to your homepage go to the link that says 'Change plan' on the right. Click up to the next plan (300 pages a month) and there you go. The largest plan for 9 months FREE and the pages rollover! I'm pretty sure you can also do this even if you only get the 2.99 card.
Many of the tutorials on the internet suggest stacking the codes '2school' or '3freeink' to get more months, however, the HP site, will not let you stack all of these codes together and '6freeink' is the best code, so that's the one that applies.

Friday, July 28, 2017

No Cricut? No Problem!

First let me say, this is my first ever tutorial, go easy on me :)

Recently I posted in a Facebook group about how I had made a name decal for my Happy Planner Teacher Planner without owning a Cricut or Silhouette machine. That was about 6 weeks ago. Since then, I started a teacher Insta and also shared my decal on there. What can I say? I was proud of my ingenuity.

In the weeks since, many (more that expected) people asked me to post a tutorial about how I made the decal.

Now let me tell you in the interest of disclosure, I am now the proud owner of a second hand Silhouette Portrait  (thank you Facebook Marketplace) and the 'by hand' method is WAY more involved and time consuming than using a machine. But you're smart people, you already knew that. The question remains, what was my method?


First I went to Michael's and purchased a few things (of course).


I also had some things on hand already that you'll need.

  • Printer, paper, ink, etc...
  • A font that you like (I chose Luna)
  • Self Healing Cutting Mat ( like any of these.) A thick piece of cardboard would also probably work.
  • Dark Colored Sharpie or similar


The first thing I did was I printed my name in the font I chose and the size I was going to want. I played with the size for a little bit and printed multiple copies until I was happy with it.

The next thing I tried DID NOT WORK. So don't do it. Just... don't waste your time. What I did was put my paper on my cutting mat and attempt to cut each letter with my Fingertip Craft Knife. This didn't work because the paper was getting really jagged and I didn't want to transfer that to my cuts in the vinyl. Also, this part was taking 8 years, and I was really not looking forward to doing it AGAIN with the vinyl. Plus it occurred to me that the individual letter would be super finicky to hold down to either trace or cut around.

The solution I came up with was kind of genius if I do say so. Remember that sharpie? Lay your paper with your name printed on it UPSIDE DOWN on the vinyl. Upside down is important because if you put it right side up, your letters will be backwards once you get them cut out.


Once you have it positioned where you want, use your trusty sharpie to trace the outline of the letters as cleanly and as dark as you can. The purpose is to make a sort of 'stencil' on the back of your vinyl.


When you finish tracing all of your letters and have a clear line (sorry, it didn't occur to me to take a picture of this until after I had cut... whoops) you use your handy little fingertip craft knife to cut cleanly on all of your lines.


You'll end up with individual stickers for each letter that you can then place on your planner.

Clearly this method isn't quite as clean and neat as using a Cricut or Silhouette, but it is definitely a good option. I'm really proud of how the decal came out and haven't change it yet even though I do now have one of those machines.


How about you? Do you have any creative ways to add a custom touch to your things while still being thrifty?


Saturday, July 8, 2017

Hi ya'll!

This is me, taking a break from uploading my first ever TPT resource, to write my first ever blog post. Well, I say first ever, but it isn't. I was kind of internet famous as a teen. You know, blogess and whatnot. I'll stop tooting my own horn now.

I feel like beginning this blog has been kind of awkward for me. Do I just jump in? Do i introduce myself? I already have ideas for several posts, maybe I should have just started there. However, I decided to introduce myself first.

Hi! I'm Heather. I'm in my early thirties and am a second career teacher. I'm currently about to embark on my 6th year of teaching. When I was in high school and college, I loved to graphic design and when I became a teacher, that suited me well as I love to design pretty resources for my students to use. I just recently began a teaching Instagram @TeachPlanBeHappy and opened a Teachers Pay Teachers store (also TeachPlanBeHappy).

I live in Northern Virginia, but I grew up in New Jersey, first by the shore, then over by Philadelphia. I've also lived in Maryland and North Carolina. I also studied abroad in Ireland for a little while.

I have several pets including a goofy lab/pit mix named Dakota, 2 Cockatiels (Kade and Trinket), and a Parakeet named Linus. I also have class fish and hermit crabs.

I love to read, especially kids and young adult fantasy. I have several Harry Potter wands and shirts, so I guess you could say I'm a Potterhead.

That's all I can really think of for right now :)

I'm currently working on uploading my first every TPT Resource, I'll blog about that when it happens. I also am planning on posting a tutorial for how to make vinyl name stickers without a Cricut. I may also post about my experiences with Class Dojo and Flexible seating.

Have a wonderful day guys!

Heather